
Overview
The Church Finder pages require that church entities have been imported into the database. This could be from an ACMS import, a manual import script, or entered manually. Updates to church entities should be done in the system of record. This means if the church entities have been imported via ACMS, use ACMS to update the details of the church. This avoids loss of data when the entities are imported by a synchronization script or other import in the future.
Please note that the information below will help to set up and configure the List and Detail view pages of the Church Finder in a basic design layout. Additional design requirements will need to be handled by the entity web design team.
How to
Configuring website pages
General workflow
- On the website create a page for listing all the church entities.
- Below the list view page, should be a subpage for church entity details.
- Depending on the design template of the website, there may be page presets for the List and Detail views.
- If page presets are not available:
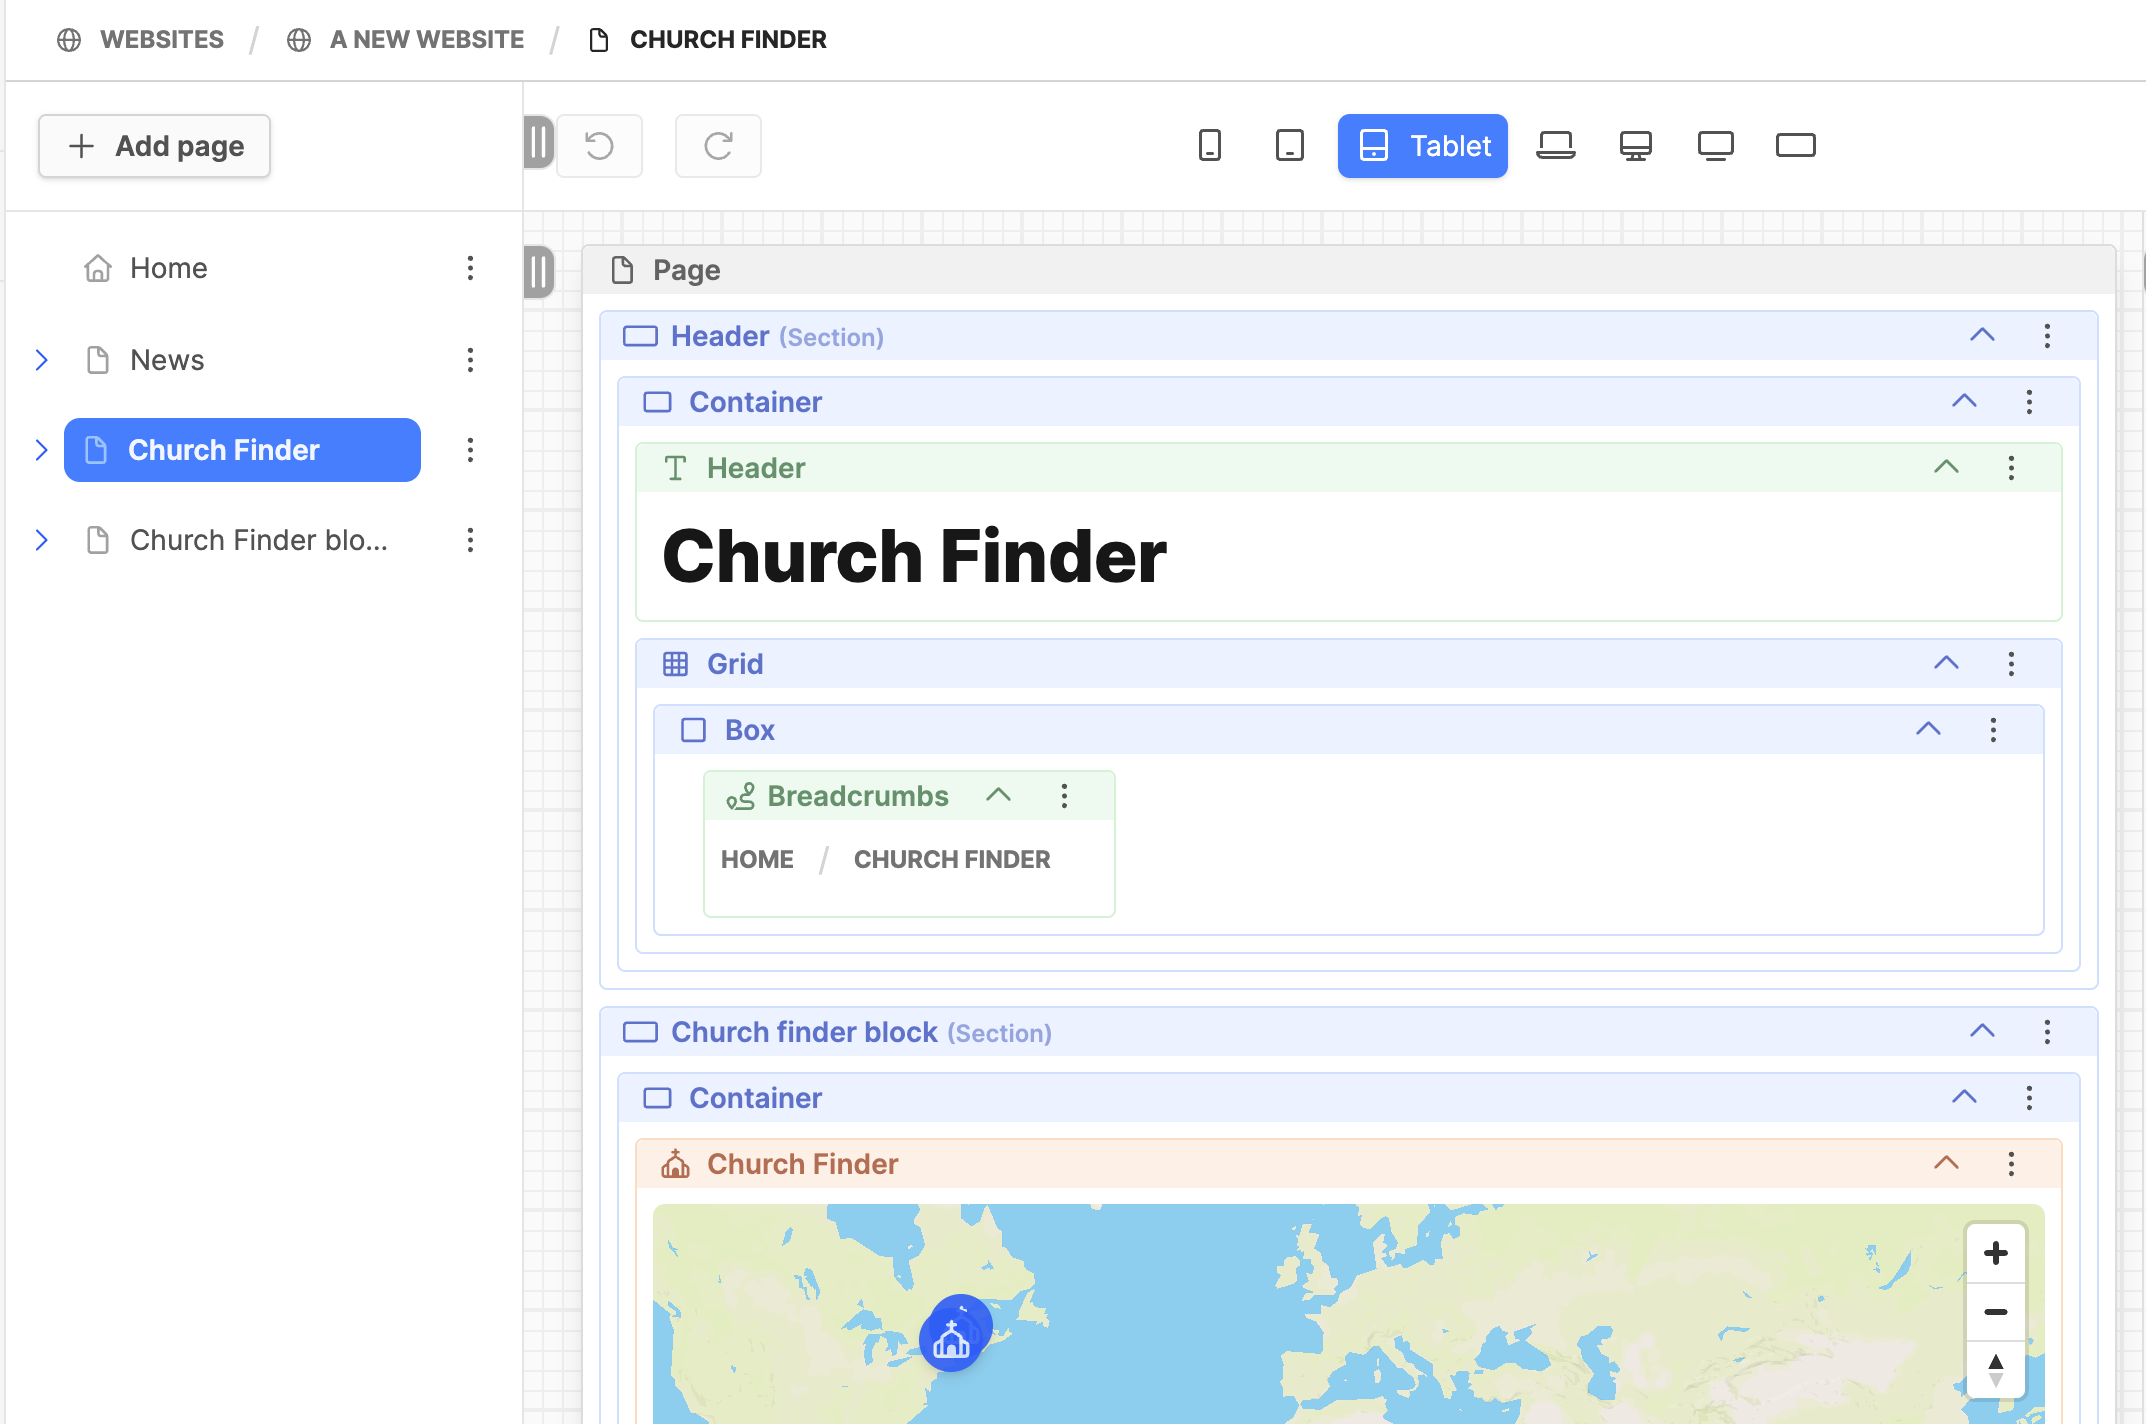
- The list view page should implement the Church Finder block, found under Blocks>Churches.
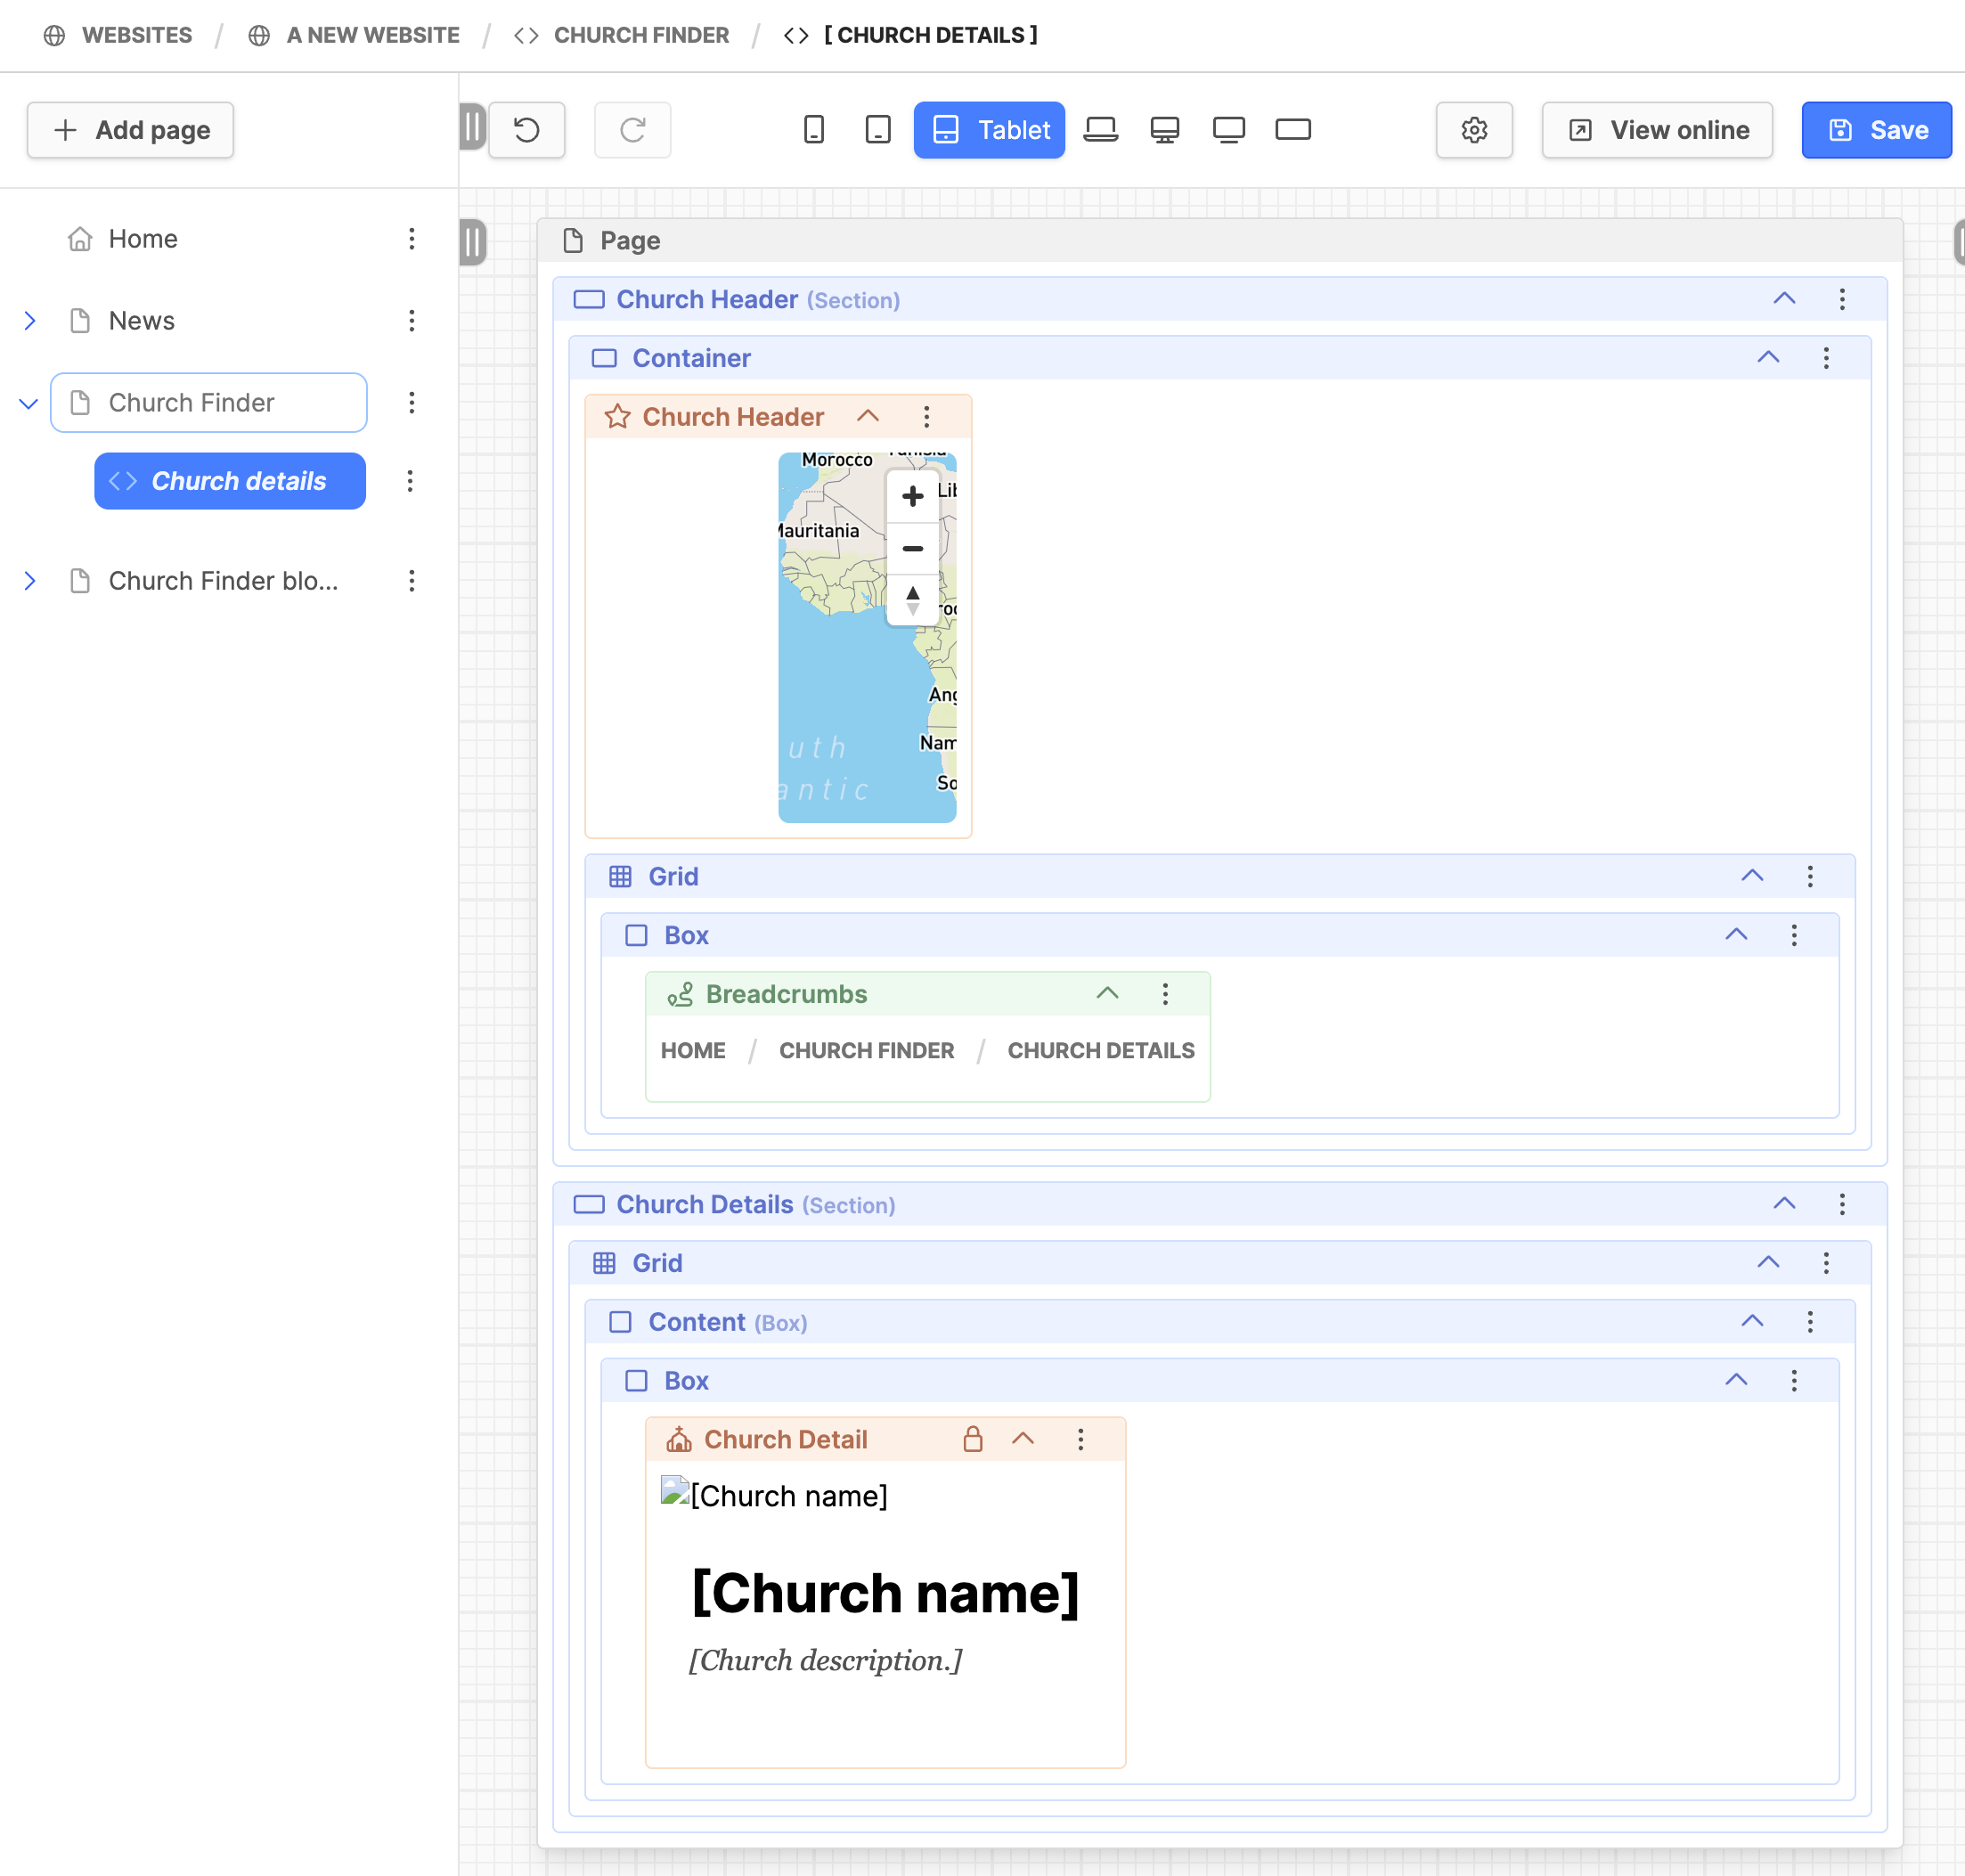
- The detail view page should use the Church Detail block. Use the Church Header block as page header.
- These pages will need to be designed to look good for all device widths. See the instructions below.
Using page presets
- Expand the Web module by clicking on it.
- Click on the title of the website you are working on.
- At the top of the page tree, click on the Add page button.
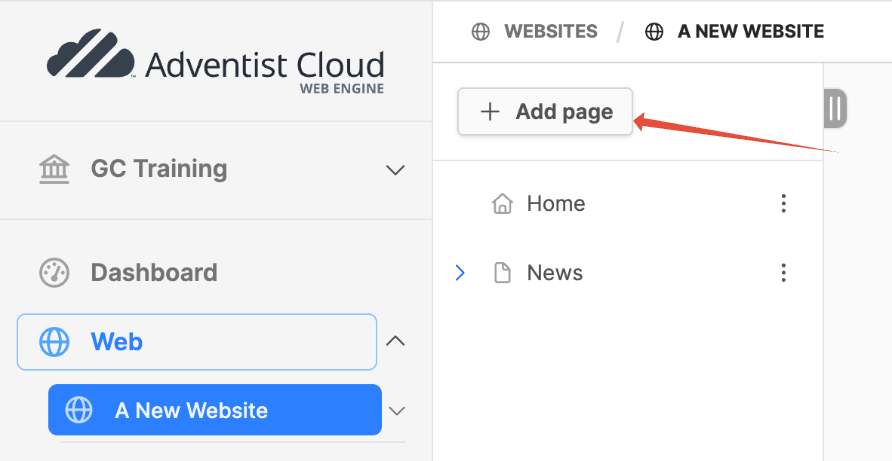
- In the modal box, provide the page Title, "Church Finder" is suggested.
- Leave the slug as is and click on the Create button.
- The Page preset screen will come up on the right side.
- Click on ALPS - Church Finder - List view (or the preset for your design).
- Click on the page menu for the Church Finder page (3 dots to the right of the title) and select Add subpage.
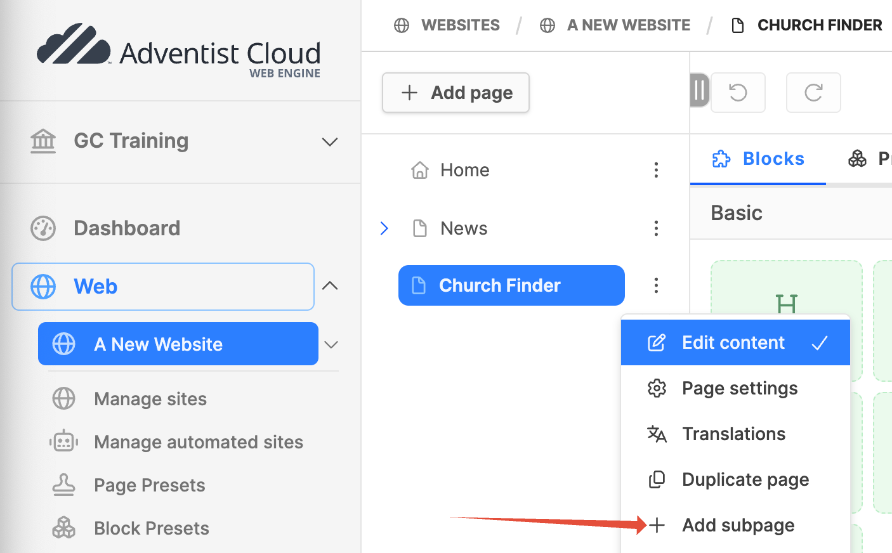
- In the modal box, provide the page Title, "Church details" is suggested.
- Leave the slug as is and click on the Create button.
- The Page preset screen will come up on the right side.
- Click on ALPS - Church Finder - Detail view (or the preset for your design).
- The Detail view page and the List pages need to be configured for the Church Finder to work correctly. See the instructions below for configuring the Church Finder and Church Detail blocks.
If page presets are not available
If your design does not have the Church finder page presets, you will need to make the Church Finder List view and Detail view pages manually.
- Expand the Web module by clicking on it.
- Click on the title of the website you are working on.
- At the top of the page tree, click on the Add page button.
- In the modal box, provide the page Title, "Church Finder" is suggested.
- Leave the slug as is and click on the Create button.
- The Page preset screen will come up on the right side. Depending on your design, you will want to use a page for the List view that gives you the entire width of the page to work with.
- Click on the page menu for the Church Finder page (3 dots to the right of the title) and select Add subpage.
- In the modal box, provide the page Title, "Church details" is suggested.
- Leave the slug as is and click on the Create button.
- The Page preset screen will come up on the right side. Depending on your design, you will want to use a page for the Detail view that gives you the entire width of the page to work with.
- Click on the Church Finder List view page.
- On the page, drag and drop the following blocks in this order (each block goes inside the block above it):
- Section block
- Container block
- Church Finder block
- Click on the ChurchDetails view page.
- Use the image below as a template for the blocks needed on the page. This is a basic design or layout for the page. Make sure and add the proper layout blocks as shown in the image.
- Recommended blocks:
- Church header
- Breadcrumbs
- Church Detail
Configuring the Church Finder and Church Detail blocks
Once the List view and Detail view pages are in place, they will need to be configured. Start with the Detail view page first, as it will be needed on the List view page.
Church Details view page:
- Click on the page menu (3 dots to the right of the title) and select Page settings.
- Navigate to the Advanced tab.
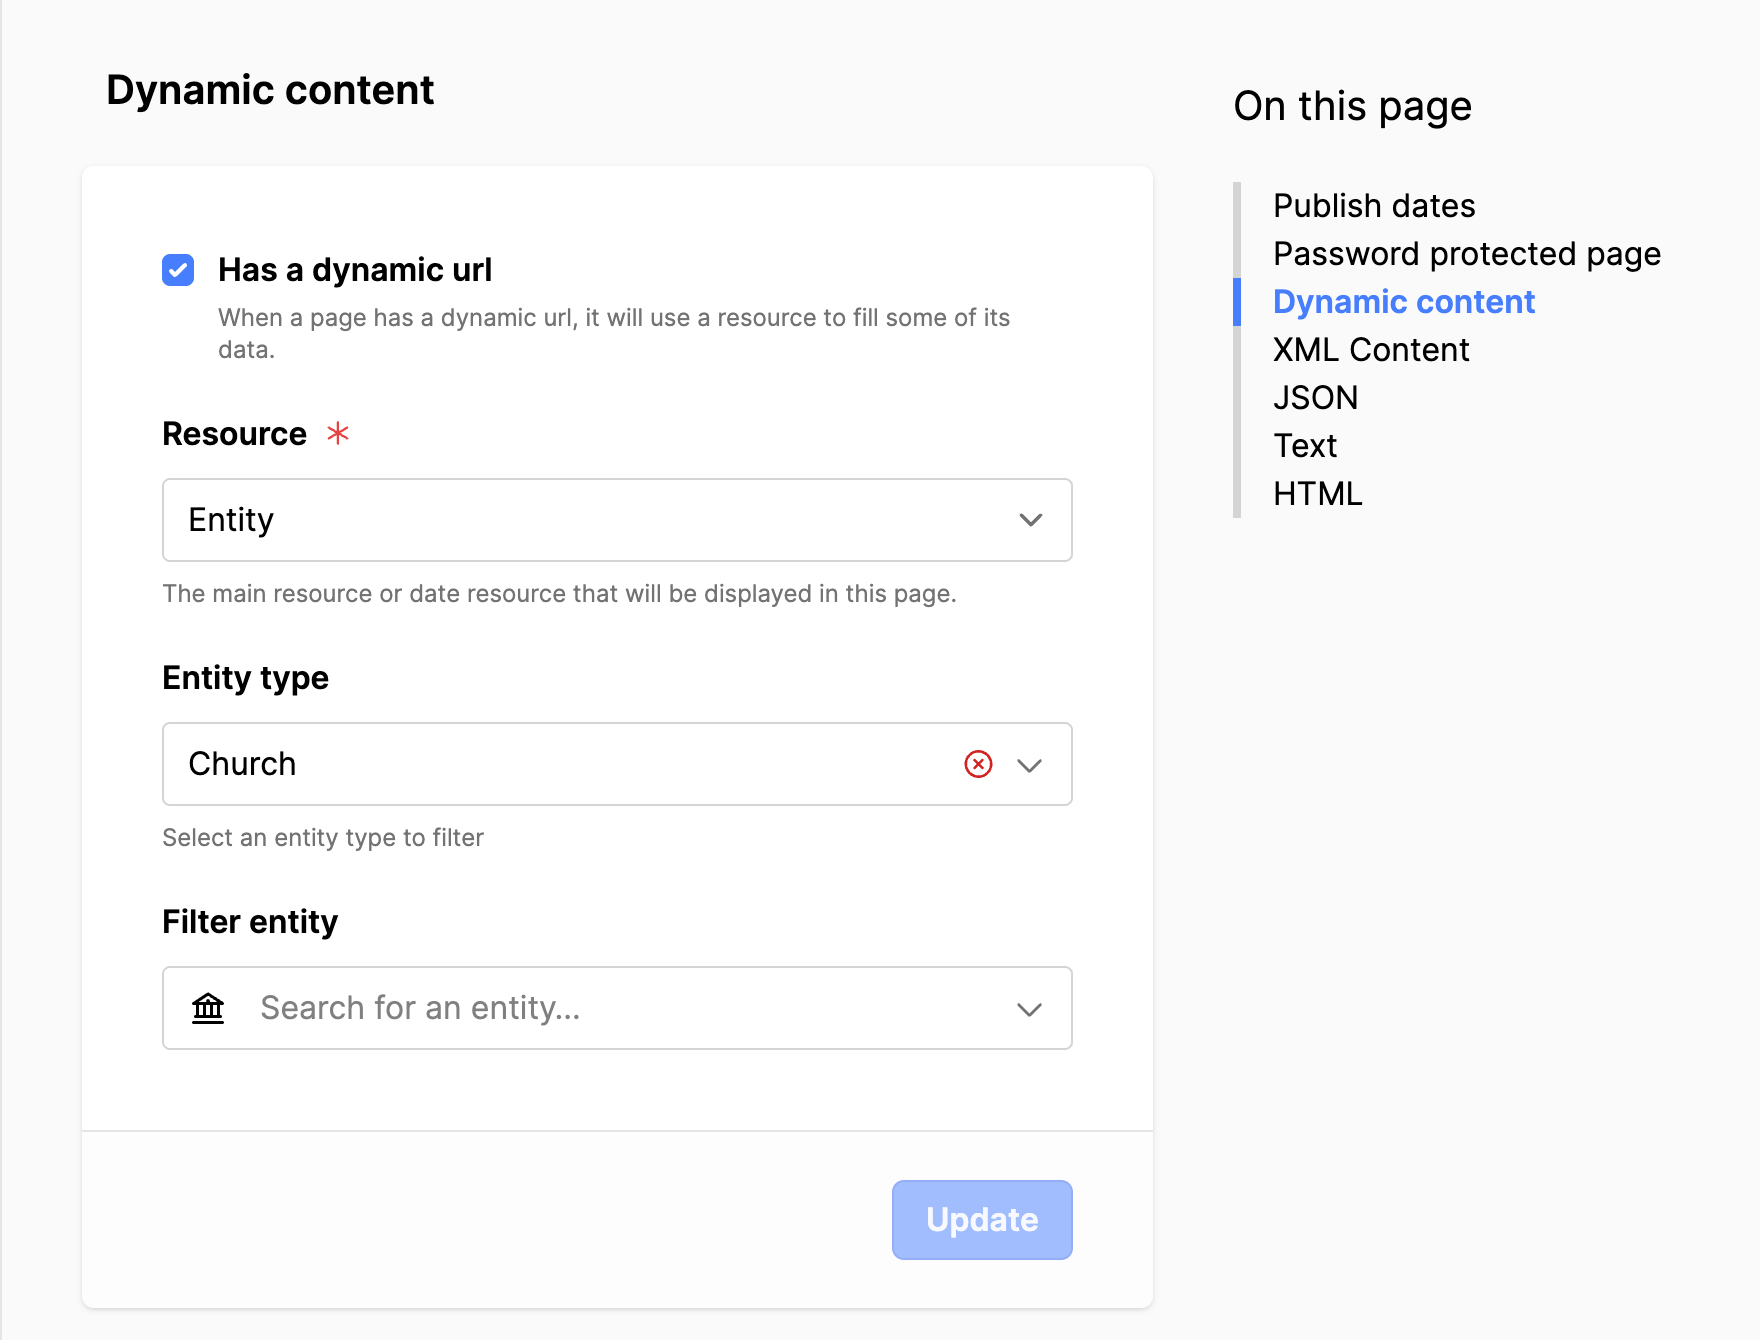
- Scroll down to Dynamic content and set the following:
- Set a checkmark in field Has a dynamic url.
- Set Resource to Entity.
- Set Entity type to Church.
- Click on the Update button.
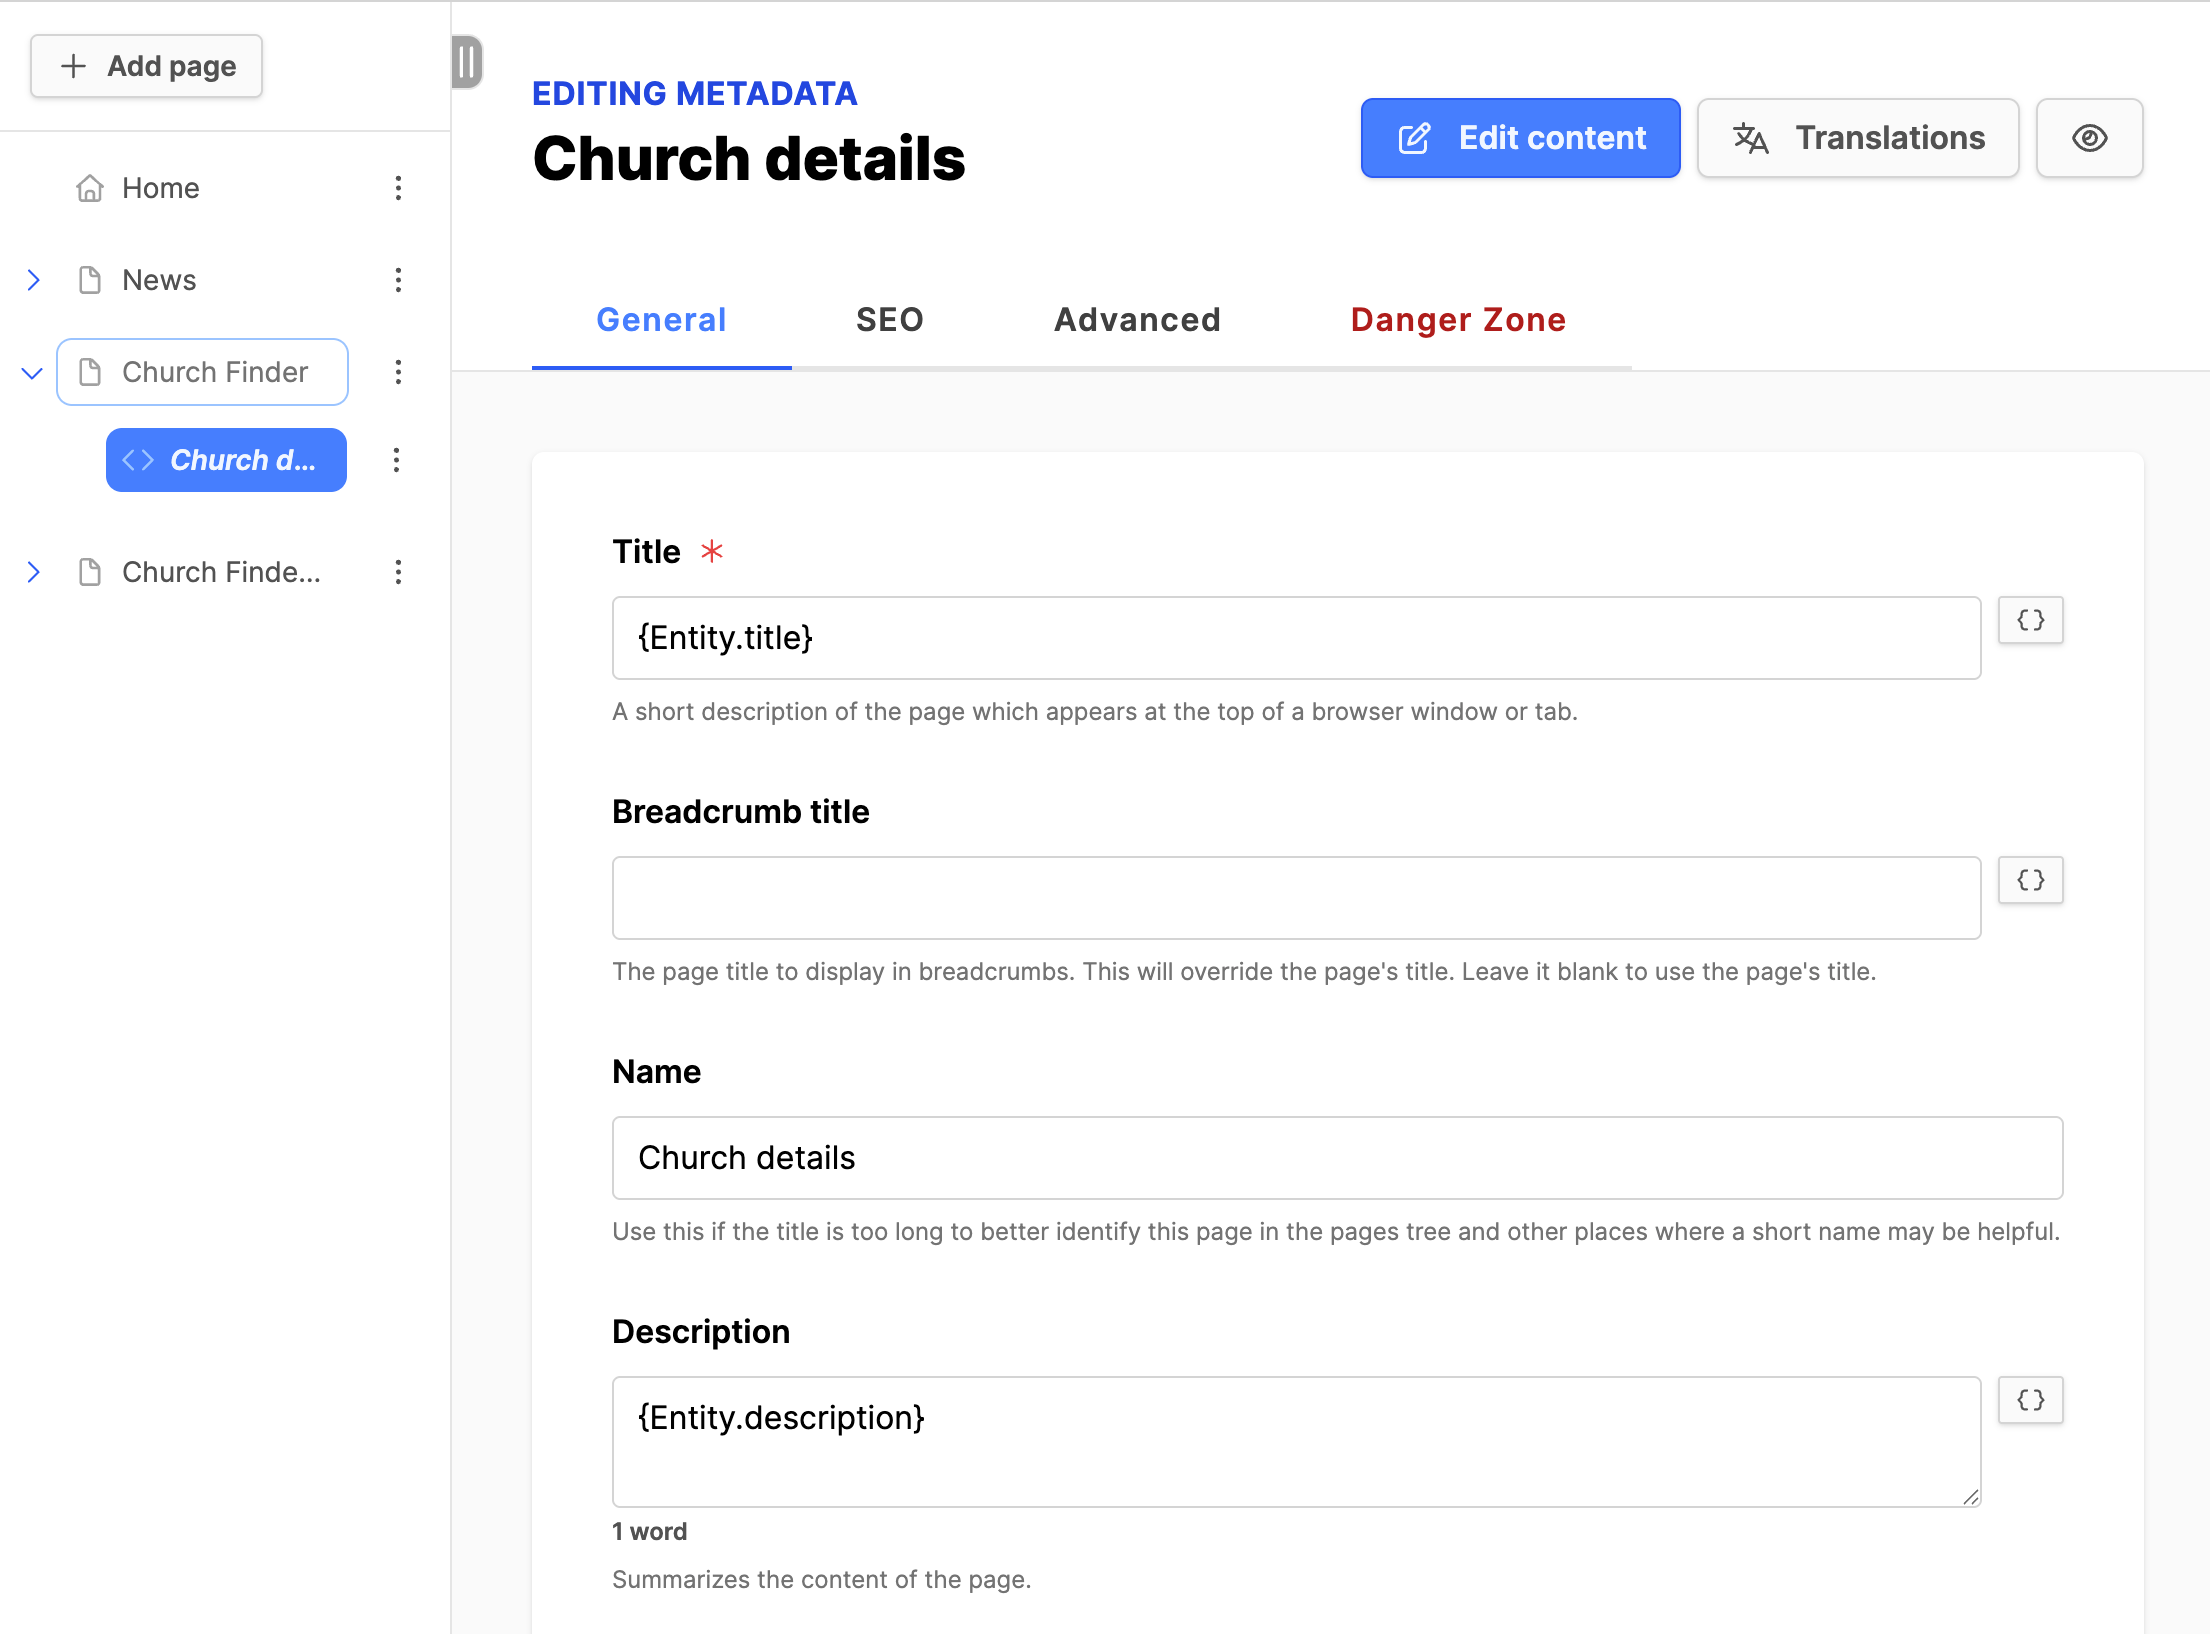
- Navigate to the General tab and set the following:
- Title = Erase the title and select the {} from the right and choose Title, {Entity.title}.
- Name = Your choice to display in the page tree and the modal box, "Church details" is suggested.
- Description = Select the {} from the right and choose Description, {Entity.description}.
- Hide in menus = set checkmark for the field.
- Click on the Update button.
- Navigate to the SEO tab.
- The fields are populated from the General tab.
- Overwrite these if you need to.
- Set Image = Select the {} from the right and choose Image, {Entity.image}.
- Set Type = Website.
- Click on the Update button.
Church Finder List view page:
- Select the title of the Church Finder List view page and click on light orange bar at the top of the Church Finder block.
- Under the Properties tab on the right (you may have to use the tab to Expand), scroll down to Detail page and click the button Select a page. In the modal box, expand the Church Finder. Select the radio button to the right of the Detail page you created. Click the Select button.
- Now, you will need to configure the map and filtering for your context:
- Scroll up to Default visible region: in the search field set your country, state or region for map area displayed.
- Pro tips:
- Use the zoom (+ and -) to adjust the zoom level.
- Move the map pin to locate the map center where it is needed.
- Entity types: Church.
- Entity: set the parent entity of the churches (Conference or Union or Division).
- There are additional settings you can try out to get the map working with the available features and displaying your churches correctly.
- When done, make sure to click the Save button!
- Then click on View online button on the upper right to see the List view in the frontend of the website.
- Click on a church in the list and make sure you get to the detail page for that church.
- Once the Church Finder is working, you can add this to the menu. See the link below for instructions if needed.
Notes:
- If churches disappear on the map, make sure they are in the proper entity.
- If you see churches from another region on the map, check your entity.